Thursday, August 31, 2017

Model kit project: 1/144 HGUC GM Cannon - 06

Update 06 - Finishing touches.

The last major change I made before priming was removing the shoulder vents and the chest sensor. These details were the last features exclusive to the post-war "GM II" variation of the GM that were still on my model, and after making all the other modifications I decided these would be easy.

I'm out of pithy captions at this point so I'm just going to bask in awe instead.

I puttied over the hole left by the chest sensor and glued some styrene on top of the shoulders to flatten them out.

Finally, I turned my attention back to the right shoulder joint. The left shoulder has a saddle joint to allow a forward & back hinge, but the cannon mount takes up that space. Luckily there's enough room directly behind it for the joint itself to sit in its normal position. The joint is a soft polyethelene plastic so I had to superglue it in place.  

This whole project hinged upon this pair of joints. 'Hinged', get it?
While this covers all of the model kit (except the antenna. Why again did I wait to attach those until later?), there was still the matter of the GM Cannon's sidearm: the GM beam pistol. The GM II kit included a gun but it's a post-war model so I didn't want to use it (not for this project anyway).

The old GM Cannon kit's pistol is hindered by the lack of a pistol grip: it lacks a grip because it has a hand sculpted on it.
What.

So I cut it off and sculpted my own grip.
No I can't take this pistol for the GM Cannon, what would the standard GM use then?

Luckily, since I own like six other GM kits I already have an example of One Year War-era GM beam pistol to use as a reference. I literally traced the grip onto a piece of sheet styrene and cut it out.

After repeating the process again I sandwiched the two grip cutouts together. A thin layer of Green Stuff on each side with some details sculpted on will finish it out.

Next step: priming. 

Wednesday, August 30, 2017

Model kit project: 1/144 HGUC GM Cannon - 05

Update 05 - Leg extensions.

As I didn't take a ton of photos of this process I realize some might be out of order, so bear with me here. I believe one of the legs had yet to be fitted into the shin armor when I cut off the cuffs to extend it. On
 the inside of the armor I glued strips of polystyrene to create an equidistant gap.
I wish my dress slacks were this easy to patch.

For the first armor piece I had made the cut flush with the cuff itself, thinking that would make puttying easier to blend and hide the gap. It ended up making the sytrene strips and the cuffs more difficult to glue together, as there was less of a lip to adhere to. So I cut the other three a quarter-inch higher as seen above.   
Figrue 5b - cross section of the bone, muscles, ligments - no wait.

The putty I used is a two-part epoxy known literally as Green Stuff. It comes with a blue half and a yellow half in a taffy-like strip, and once you knead them together it solidifies within a few hours. It holds detail well and can be sanded, so I smush the stuff into the gap on the shin armor and smooth its surface flat with some basic sculpting tools.  
Oh great, did I just gave my GM Christmas stockings?

It manages to cover up the ankles so mission accomplished. There are some high spots and low spots I can putty and sand later.
Well, the stripe isn't as dorky as the high-waters, but what about those bright-red slippers these Federation Mobile suits are always wearing?

I remembered the back skirt plate had these hooks for holding the cannon's spare 240mm ammunition packs. While waiting for Green Stuff to cure I cut these pieces out, traced the backs of them onto the new armor plate, and Dremel'd those spaces out so they could be glued in place.
I miss video game rentals at movie rental stores. This has nothing to do with my project, I just didn't know where else to say it.

More gaps are left behind to putty later.
It's a butt-plate. There, I said it.

The mostly-assembled model with the ammo packs in place.
No idea how the rockets in the backpack are supposed to work with all the stuff in the way, but I didn't design this mobile suit I'm just replicating it.

I assemble the arms and give every modification at this point an assessment before I begin the task of filling in most of the gaps (especially in the legs).
Oh, it's a robot? I thought I was building an army tank or something.
I've still left off the antennas, visor, chest vents and hands for various reasons but they can be easily attached after sanding and an initial later of primer. Finally, after all that, will be a brief pass at sanding and priming again to remove any remaining flaws before I can start painting. More updates to follow in the meantime.

Tuesday, August 29, 2017

Model kit project: 1/144 HGUC GM Cannon - 04

Update 04 - Legs for days.

I got to know these legs very well over the course of a week, while I worked out how much plastic needed to be cut away and which sections needed to be left intact.

It looks so simple if you look at it from far away and only from this angle 

Since both the shin armor and the GM leg structure on each leg consist of a left and right half, I approached this by fitting and gluing each side to their adjoining armor piece. Gluing the resulting halves together will be saved until final assembly. The inner legs would still be able to hold it all together while slight adjustments would be handled through putty and sanding.
The anatomy of the Bell Bottoms.

The lower shin and ankle sections were thin and narrow, so they fit inside the shin armor without much interference. The calves on the other hand needed to be cut down to the edges of the knee joint and support structures.
Didn't the original Cinderella feature the step-sisters shaving their calves to fit into some clothes? I might be recalling that wrong.

Even then, the width of the shins was the bigger issue, as the leg armor isn't much wider than the standard GM.
"I'm done buying this mobile suit pants, he keeps shredding the cuffs like this every dang week. Fine, I'll just have to drop him off at the North American front with ruined pants, then! You can deal with it this weekend!" -The point in the project I realized I needed to take a break and get a drink.

The plastic holding the knee joint onto the calves was hardly more than an index card in thickness after all the material I took off the legs.
Probably for the best I didn't become a dentist; I'm a little too haphazard with the Dermel.

To help hold the legs together and bond them to the armor, I prepared a cheap alternative to modeling putty which is simply polystyrene shavings (from the model kit itself) and plastic cement (which melts plastic on contact). The red and white shavings are small enough to simply break down into a pink paste once coated in cement and stirred.  It won't be seen from the outside so I applied it zealously to fuse the inner frame into a solid lump.
No it is not chewing gum, I already tried that.

As I proceeded to the other leg I also took care of transplanting the GM's ankles onto the GM Cannon's shins, replacing the old, simple design with the modern 'divided circle' joint seen in most Federation mobile suits.
When you're relieved to finally finish an item only to realize you have to do it all again on a second item.

The results ended up with some small gaps and minor alignment issues but nothing I wasn't expecting.
A leg, or a major award?

 That still leaves the matter of extending those cuffs down by at least a quarter of an inch. They will have to be cut off and extensions crafted using extra styrene, but I'll detail that next time.
"These JNCOs are the best-fitting jeans I've worn since my first growth spurt!" 
Stay tuned.

Sunday, August 27, 2017

Model kit project: 1/144 HGUC GM Cannon - 03

Update 03 - Modifying more parts


I did some additional cutting and sanding to get all four chest pieces sitting flush before finally gluing. The font half is now one piece and the back is a separate half, as I will still need access to the interior for puttying and for mounting the cannon, shoulders & neck joints.

After adding the collar, waist and head it was clear that the cannon housing was too high and interfered the with turning the head, so that had to be cut down later.

It's not done yet, settle down.

 To fix the issue with the old head being too big, I cut the antenna mounts off the back of the head and cut them down the middle, allowing me to shave away some extra width.
Shave and a haircut?  Probably not.

I had to cut down the height of this piece as well before dremeling space for it to sit within the back of the new head.
Never allow me near your scalp with any kind of tool.

Eventually this sat flush with the head and I glued it into place.
"Does epoxy putty work on carved bone, or does that stuff grow back?"

It was at this point I had examined and compared both kits in-person enough that the shape of the central hip plate was different enough on the GM Cannon from the GM II. I concluded it had to be entirely cut off the old kit to replace the flatter, smoother new one.
I had to cross my legs and wince while performing this step.

The GM II's hips were whittled down to accommodate, using my ever-handy Dremel tool.
I'll be using this same design once I eventually have my own hips replaced.

The sides of the plate had to be shaved down extra in order to allow room for the skirt plates (like everything else on its torso, the old kit was just too wide). But with some putty and more sanding it should blend in as good as the original.
"At first it's constrictive... but after a while it becomes a part of you."
In fact, asides from the shin armor, most of the kit at this point dimply requires puttying gaps and sanding before priming. I prepared all of the leg parts from the new kit that would go into the final model: the feet, thighs and inner parts of the shins.

Since this was enough to get the model standing on its own, I assembled what I had so far for a current progress photo: 
Ta-da! No it is still not done yet, shush.

The dreaded leg armor is going to be an extensive process. They will have to fit inside the shins but still hold the ankle and knee joints in place,and both legs will have to match each other in exact placement. Since I don't want the GM Cannon to end up with a short leg or a gimp knee a lot of measuring and alignment adjusting will go into this.
I will be focusing on this next hurdle and skimming some of the finishing touches on the other components until they're all ready for final preparations. At that point it will start to resemble the completed kit, so stay tuned.

Saturday, August 26, 2017

Mobile suit piloting tip #1

Always move in and out of cover with purpose. Carefully study the differences between the following situations:


01: The wrong way.

This MS-06 Zaku II stands out in the line of sight of the T-61 battle tanks. Don't do that.


02: The right way.

Observe how quickly the RX-78 Gundam moves from behind cover while the Zaku IIs are distracted. This is proper use of cover.

Friday, August 25, 2017

Model kit project: 1/144 HGUC GM Cannon - 02

Update 02 - Lots of cutting and fitting


With both model kits in hand, I was able to get into full swing of converting the GM into the GM Cannon.

It's like a buffet, I don't know where to start.
For the sake of keeping organized I broke the whole project down into multiple little projects by each component that required conversion, and from there I itemized tasks to perform before it could be counted as completed. This reduced my tendency to stare at a pile of incomplete parts and think "I could work on that some more... but this still needs a lot of work..."


The shoulder cannon is of course the most obvious unique component from the original GM Cannon kit. The cannon itself and its mounting point are separate pieces and designed to angle with about 45 degrees of movement, but the whole thing is housed inside the right shoulder assembly.

We'll find out how the shoulder joint is supposed to fit inside in update #12
In the last update, I had already cut this section off the front and back halves of the old kit's chest. A similar amount had to be carved out of the new kit's chest to accommodate. This included the neck collar piece as it extends over the chest vents.

Carving chunks out of a brand new kit you just paid money for is a strange feeling for the first minute. After that it becomes cathartic.
The old kit had a slightly larger and wider chest, so getting the cannon mount to line up and fit snugly with the new GM's chest parts involved cutting away a little bit of material, test fitting, add repeating the process. Eventually they reached a compromise, though I waited to prep a few other related components before properly gluing these into place or putty the gaps.

I totally knew these were going to fit and not end up a horrible failure.

The second-most prominent feature of the GM Cannon is the shin armor. For whatever reason an artillery support mobile suit needs extra protection in the legs, so here they are.  I decided I would carve down the GM II's shins as narrow as possible and glue them inside the GM Cannon's shins. This would allow me to keep the newer kit's ankle and knee joints. Combined with the fact that the shin armor was short and required an extension, this sub-project proved to be the most challenging.
Just like in highschool, being stuck with high-waters will prove to be the death of me.

The unique backpack unit turned out to be a simple parts swap; no gaps to fill, just glue in place once ready. I get to save the GM II's original backpack for some future project.

"Dear God, this parachute is a knapsack!"

The next component to tackle is the antenna assembly on the back of the head. The old kit had a very large head, so this part will need to be cut down to just the antenna mounts and then further whittled to fit the back of the new head. It will need some cutting and puttying to blend them but not any actual sculpting.
A mobile suit of infinite just, of most excellent fancy...
Next time, I'll finish up the chest and delve into the conversion of the other components. I'll be able to show off what the partially-assembled model looks like with some of the modified parts attached. As usual, stay tuned.

Wednesday, August 23, 2017

Model kit project: 1/144 HGUC GM Cannon - 01

Update 01 - selecting the kits

To confidently start the process of kit-bashing my own High Grade GM Cannon, I had to commit to which two kits I would combine. As mentioned in my previous post, there was only one model kit which included the GM Cannon's unique components in 1/144 scale and is *not* prohibitively expensive: the original un-graded RGC-80 GM Cannon from 1983.

"Serving suggestion"

The one positive point of model kits from this pre-High Grade era is their inexpensiveness (which strangely enough are still produced and sold with some frequency).  I spent about six dollars for this GM Cannon. The version I ended up obtaining was actually from the sequel series Mobile Suit Zeta Gundam, but the only difference was its color: molded in red plastic as opposed to white. For this project it doesn't matter.

A turd in desperate need of polishing and a few coats of paint

Compared to literally any High Grade kit from the past 20 years, this thing is a beast. Not a tough, majestic 'beast' mind you; rather some miserable beast that crawls and skulks, like a toad or an anteater. This makes the 1/144 Gundam Wing kits from the mid '90s look like a marvel of engineering. Everything is molded in a single color, so painting is a must.  Nothing snaps together like Bandai's modern kits do or even attempts to line up in a snug fashion, so everything requires glue as well. A truly cretinous kit, or perhaps I am merely spoiled.

I actually studied its instruction manual online at Hobby Search (www.1999.co.jp/eng/) to make sure it was not too low-tech for this project. As weirdly-proportioned as it is with a very low parts count, most of the components I needed to take from it appeared to be separate or easily removed from its parent part, like the cannon or the backpack. The shins were a bit short, but that could be remedied. Finally, the details were good enough to match more recent models of its scale.

To compensate, whatever I used for the main body in this project couldn't simply be the closest possible design to the standard RGM-79 (which the Cannon variant was derived from), it most importantly needed the best sculpt and points of articulation available. The original High Grade GM was serviceable but shows its age when compared to newer kits with double-jointed knees, articulated waists, saddle joints in the shoulders, and so on. Luckily, one of its closest variants was made as recently as 2011: the RGM-79R GM II.

AKA the RMS-179 GM II, to obscure the fact it is a minor post-war retrofit.

Even though the GM II is covered in little doodads that differentiate it from the standard mobile suit, most of these will be replaced by the CM Cannon's components, such as the shins and the back of the head. A brief study of the instructions again convinced me that the GM Cannon's parts could be swapped in without too many surprises. After waiting a couple weeks I found a vendor drop their price to $15 for a GM II and ordered one.

I actually started working on the old GM Cannon before the GM II kit arrived, preparing the components that would eventually go onto the newer kit. The first order of business was cutting away the right side of the chest, containing the cannon's mounting point and that specialized chest vent.

Yes, most of this kit's major components are simply a front half and a back half sandwiched together

Considering how few parts this kit used overall, Once I had removed the parts I needed for this project I went ahead and took the extra 20 minutes to build the whole thing. It was for curiosity's sake more than any other reason.

Did anyone else see that early episode of Gundam where Amuro went back to his childhood home and found that old flimsy Pinocchio doll of his, and wondered just who in the space age would own such a crappy figure? Well, evidently now I do.
Next time I'll cover which parts are going where on the new kit, and begin the real work of carving components down to snugly fit onto the combined GM. Keep an eye out for the next update real soon.

Tuesday, August 22, 2017

Model kit project: 1/144 HGUC GM Cannon

I'll need to quickly sum up what exactly this model kit project is all about, as all but one person reading this will have any idea what these model kits are from.

Long story short, 
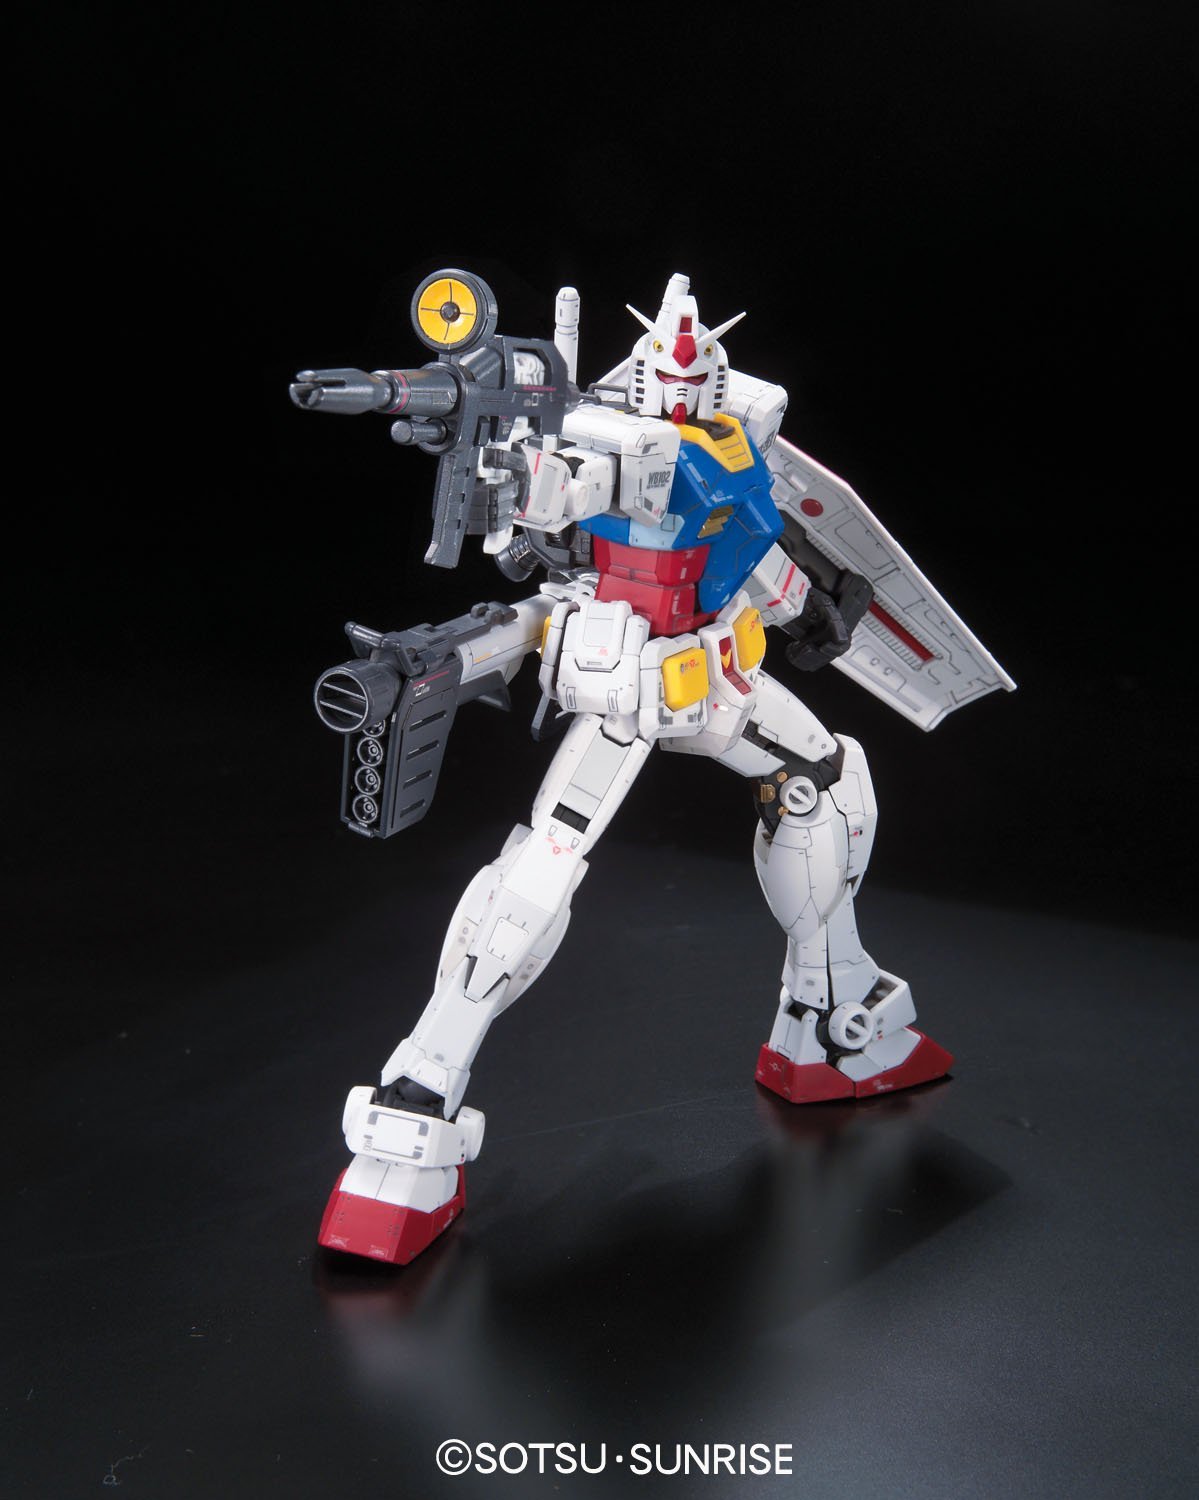
Mobile Suit Gundam was an animated Japanese series from 1979 about a war among space colonies orbiting the Earth and the Moon. The titular Gundam was a prototype 60-foot tall piloted robot (or 'mobile suit'. You will see me type "mobile suit" a lot and "60-foot tall piloted robot" almost never). The original show wasn't actually much of a success until Bandai started making scale plastic model kits in the early '80s and generated enough interest to warrant a sequel, and therefore more model kits and so on for forty more years.

Turns our those AMT Ertl sports car kits at Hobby Town were not the pinnacle of plastic scale model engineering.


Now, some people might look at my current display of 1/144-scale Mobile Suit Gundam model kits and say "James, those are too many Gundams."

This is only most of them. The new ones, anyway. Don't ask me where I'm going to find space for all the old 1/100-scale kits because oh god


My knee-jerk response might be to clarify "strictly speaking, only three of those mobile suits are technically Gundams."

But that would be pedantic so I'd probably keep my hypothetical mouth shut, shrug and say "eh."

Because really, compared to how many more model kits are out there in the High Grade Gundam line, my collection is a fickle subset within the vast options spanning over three decades of production. But that's not an interesting subject compared to the issue behind this project, which is all the model kits I want that aren't out. And I don't mean upcoming releases (I have those pre-ordered), I mean mobile suits that haven't been rendered in scale model form for decades, if ever.

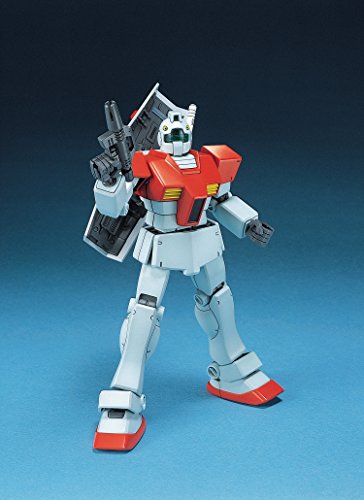
A lot of these involve variants of the GM, the 'Gundam Mass-production" mobile suit (or is it 'General Mobile suit'? Not sure if Japan knows that answer). It's a zero-frills version of the protagonist's bleeding-edge top secret test unit, and I just like the contrast between a flashy super-powered 'hero' and its down-to-business front line cousin. The GM is a charmingly dweeby design and would be considered one of my favorites, if only I could pick a preferred variant; I own seven and have three more in the wishlist queue. But from this project ten is clearly not enough variety.

Look at me, I don't even have a name badge!

For starters, there's plenty of solid model kit options for the standard RGM-79 GM, the most prominent being the High Grade Universal Century kit from 1999. As with most HGUC kits, it's molded in about 5 colors of plastic, requires no glue and has enough points of articulation to be reasonably pose-able. It's a fun little kit! But what do you do if you want the RGC-80 GM Cannon, a mid-range artillery support mobile suit? Well, you have three options to consider:

I hate you, P-Bandai. Why wont you take my money?

First, you could get the GM Cannon in the 1/100 scale Master Grade line, which retailed for about $40. Oh wait, except that was sold exclusively on Bandai Japan-only webstore, and goes for over $80 now.

A well-polished turd.

Or you could buy the 1/144 'First Grade' GM Cannon from 1983, the only other time they have made an official GM Cannon kit. It's by far cheaper than any other kit and it shows. More on that later.

One kit for the price of eight.

Finally, there might still be places selling resin conversion parts to convert a standard GM kit into the Cannon variant, from anywhere between $50-$150. Assuming you can still find them for sale, that is.

I prefer to try my hand at a fourth option: use the old FG kit to convert a regular High Grade GM into the Cannon variant. In other words, a good old fashioned kitbash.

Fuuuuuuusion!

With the two model kits selected and acquired, the plan for this project consists of three major phases:

1) Remove the unique components from the old GM Cannon kit
2) Cut away the parts of the new GM kit that will be replaced by the old kit parts
3) Glue, putty and sand the kitbashed parts together for a mostly-seamless blend

After that I'll just need to hit it with some paint and call it finished.


I am pretty far into this project (spoiler: it's going well) but I wanted to get a head start and a back log of progress photos ready before I began writing detailed progress logs. Next time I'll go over the model kits I chose in order to create this amalgamated mobile suit model. More to come soon!